To create beautiful Gunpla, you need your hands, as well as some tools to make your life that bit easier.
This page will serve as a basic guide outlining some of the tools that I think are essential to create awesome-looking Gunpla. Of course, this is not an exhaustive or comprehensive list that needs to be followed like the gospel; it's merely a collection of tools and devices that I've found to be most helpful in my building.
This page will serve as a basic guide outlining some of the tools that I think are essential to create awesome-looking Gunpla. Of course, this is not an exhaustive or comprehensive list that needs to be followed like the gospel; it's merely a collection of tools and devices that I've found to be most helpful in my building.
Purists be warned: the tools you're about to read and see can be quite "ghetto" - I tend to use tools which are able to fulfill its intended purpose, not justified by its price.
Overview

Gunpla technology has progressed to the point that any builder can construct a kit using the most basic of tools. A simple pair of scissors or a penknife is enough to remove the parts from the sprues due to modern gating technology. Sure, you can be traditional and saw off parts with a retractable penknife, but dedicated modeling tools designed for Gunpla will sure make your life a HELL lot easier.
The above is the full works, close to everything I will ever use when building a normal kit. Most of the tools are there just to accommodate for contingencies - I don't want to be caught without a pair of pliers when two halves just refuse to fit, for example. I will now highlight the key tools used to build your Gunpla.
The Essentials

The five tools you see above no doubt rest in every builder's inventory. From left to right: Gundam Panel Marker, Hobby Knife, Tweezers, Cotton Bud, Hobby Nipper. I will discuss each in turn, beginning with the most important tool of all: the Nipper.
Cut and Snip

I cannot emphasize the importance of this particular tool enough. Simply put, this is the bread and butter tool when it comes to building your kit. This is the tool that will free your parts from their plastic prisons. This is the tool that will separate good-looking Gunpla from leprosy-ridden ones. Therefore, it is essential for you to get a good pair to greatly aid in your building.
When choosing nippers, go for the ones with the narrowest tips, as narrow as you can find. Most nippers you find in hardware stores (also called wire cutters) are designed to cut copper wire or metal, and thus will be overkill for your plastic kits. I once sheared off a good 1/3 of a shoulder part just by using industrial nippers, so it is important to use nippers that only cut what you need to be cut.
Also, a good pair of nippers will save you a lot of follow-through later on. If the cut is close enough, you don't really have to sand down the nub or remove any excess material, you can move straight to the snap-fitting. Bear in mind that as a casual builder, I don't really have the patience to sand down nubs, so a good nipper is a godsend for me.
Where Can I Get One?
Most hobby shops sell nippers tailored for hobbyists, with narrow tips and sharpened edges, so a trip to any model kit or hobby store should net you a decent pair. Bandai also manufactures nippers in BB Sanguo designs, and those work perfectly as well.
Flash Edge

The next tool you'll use most often is the hobby knife, also known as art knife, X-acto knife, etc. A multi-purpose tool, the hobby knife is used to slice open the packets holding your runners, trim off excess material from nipped parts as well as separate completed parts in the event of erroneous construction.
Be warned through, these things are sharp, REAL sharp. A fellow hobbyist once commented that these things are "quite possibly the sharpest things my fingers have known", especially if you are using X-acto blades, so do exercise caution unless you want your kits to have a crimson hue.
Hobby Knives can also be used to cut out water decals, amongst other uses, so look around for the type to suit your needs.
Where Can I Get One?
If you want it cheap, Daiso sells great quality ones for S$2. If not, any hobby store or craft store should be able to furnish you with a decent one. Word of advice: get those with replaceable blades, that way you won't have to fork out money for a whole new knife whenever your blade becomes blunt.
The Grabber

The next tool most commonly used is the tweezers. Those pesky HG 1/144 stickers and RG realistic decals are a pain to apply with fat human fingers, so a pair of skinny, metallic prongs will do the job. Tweezers can also help to orientate naughty polycaps, or maneuver small parts into hard-to-access areas, like a shoulder joint recessed into right chest armor covered by a movable flap. Tweezers are also ESSENTIAL when it comes to applying water decals.
As with nippers, get tweezers with the narrowest tips. The ones suited for arts and crafts would be fine, if it can pick up beads, it can pick up those darn stickers. You can get two types: the curved-tipped and the straight-tipped, to help you with the sticker placement better as some parts don't permit the use of curved-tipped tweezers, and vice-versa.
Where Can I Get One?
Daiso sells a variety of craft tweezers with varying tips and widths. Other than that, hobby shops would sell tweezers catered to model kits.
White Fluffy Sticks
Not exactly a manly item per se, cotton buds or Q-tips work in tandem with tweezers to ensure that your stickers, well, stick. They also perform other functions, such as panel washing, ink removal, cleaning of tools, etc., but are mostly use to press down on the tiny stickers and decals. There's a whole range of cotton buds available, but as with nippers, the narrowest ones are preferred.
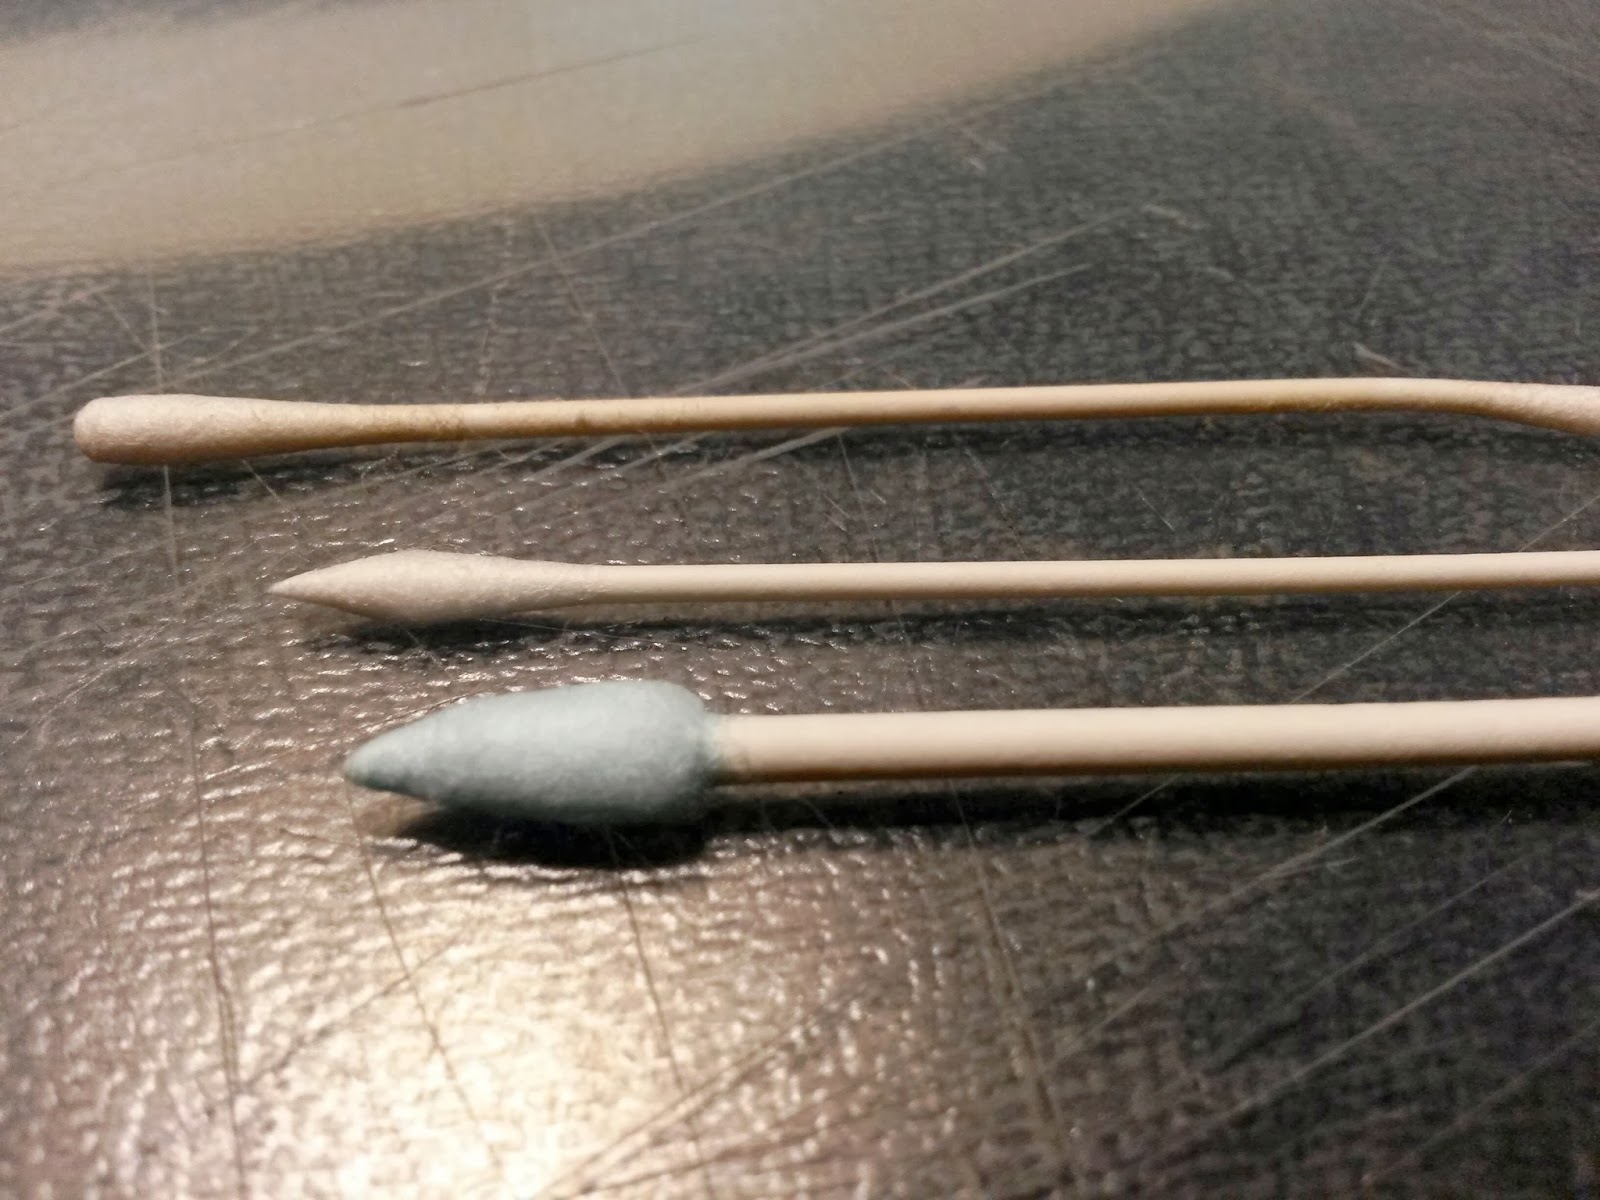
In a nutshell, you would need two types of cotton buds: the pointy ones and the rounded ones. The rounded ones are your run-of-the-mill cotton buds, used to secure stickers and remove excess ink. The topmost one in the picture above is a Tamiya round-head that is used exclusively for model kit stickers. This is the one to use when pressing down on the notorious eye-stickers of Gundam-type kits.
The pointy-head one below the round-head is also from Tamiya, and is used to move stickers around before deciding on their placement. Don't use too much force when using these as they tend to warp the sticker or even tear it if you so much as impale it like Amuro did Lalah Sune in Mobile Suit Gundam.
The thing about Tamiya cotton buds is that they are fairly expensive. A normal tub of standard cotton buds of around 50 sticks cost a dollar, but a pack of 30 Tamiya sticks (round-heads and pointed) sets you back S$6.90. A cheaper alternative, albeit not as effective, are the blue ones below the Tamiyas. They come from Daiso (by now you would know that I frequent there), and have both rounded tips and pointed tips in a single bud. Although they are a little fat, they still do the job.
Where Can I Get One?
Hobby shops, Daiso and thrift stores will have them in varying sizes, styles and colours.
Once you go black, you can't turn back

Lastly, we have a fairly recent addition to my arsenal, the Panel Line Marker. I dabbled in paneling when I first started on HGs, decided that I didn't like the way it made my kits and just did not do it again until recently. Modern kits have plenty of details and lines crisscrossing their surface, but to bring them out using paint kinda makes the kits look strange, for the lack of a better word. Perhaps it's my technique, but the panel lines make the kits look comical and hilarious, far from it being a fearsome fighting machine as envisioned.
Nonetheless, I recognise the merits of paneling, and have incorporated some light, minor paneling in my more modern endeavours. I still don't panel line whole kits, just the parts which will benefit most from the added detail, like the "thighs".
However, I use the Panel Marker for a different purpose: adding detail. Most of the kits in the Gundam Universe rely on the colour black to add the illusion of equipment or to look more tactical, therefore, a black marker will serve this purpose well. The GM01 Black Gundam Marker works, but the tip is too fat for my liking, that's why I use the Panel Marker to do most of the detailing, especially for a Gundam's head: face-plate, air-intakes, vulcans, the works. It's a chore definitely, but I cannot argue with the end result.
The second pen you see below the Panel Marker is actually a Scriber. I came across it last weekend at Hobby Art @ Work, and asked if this could be used for paneling. It's actually a mechanical pencil that can indeed be used for paneling as well as drawing, if need be. I haven't really used it yet, but I think it will be easier to get more solid panel lines, albeit lines that will more easily dissipate.
Where Can I Get One?
You have to get these at hobby shops as most stationery shops don't stock them at all.
TO BE CONTINUED...
No comments:
Post a Comment